Navigating the open seas is a skill that sailors have honed over centuries. Whether you are an experienced sailor or a novice, understanding the International Association of Marine Navigators and Lighthouses (IALA) navigational beacons is essential for safe and efficient navigation. In this blog post, we delve into the world of the buoyage system and explore the different markings that guide sailors through different waterways.
Buoyage System Overview Before delving into specific markings, it is important to understand the buoyage system itself. This system consists of a set of guidelines and standards established by the IALA to ensure consistent navigation aids around the world. There are two buoyage systems: IALA Region A and IALA Region B.
IALA Region A:
• In Region A, navigational beacons are placed to maintain a green buoy shape when entering the starboard port or port. Red buoy on the side (right) and port side (left).
• This system is used in regions such as Europe, Africa, Australia, and parts of Asia.
IALA Region B:
• Region B has the reverse placement. When entering the port, place the red buoy on the starboard (right side) side.
• This system is mainly used in America, Japan, and the Philippines. Now, let’s examine the different types of markings within the buoyancy system.
Side Markings: Port Hand Markings (Red):
• These markings indicate the port side (left side) when the canal is entered from the seaside.
• They are usually red in colour and may take the form of buoys shape, beacons, or other structures.
Starboard Hand Markers (Green):
• These markers indicate the starboard (right) side of the channel entering from the seaside.
• Usually green, but shapes vary.
Examples: buoy shapes, beacons, pillars, etc.
Priority Channel Markers (Red and Green):
• These markers indicate priority channels when waterways diverge.
• It has horizontal red and green stripes and can be turned on or off.
Cardinal Marker: Northern Cardinal Marker:
• This mark indicates that the safest waters are north of the marker.
• It is black and yellow with two black cones pointing upwards.
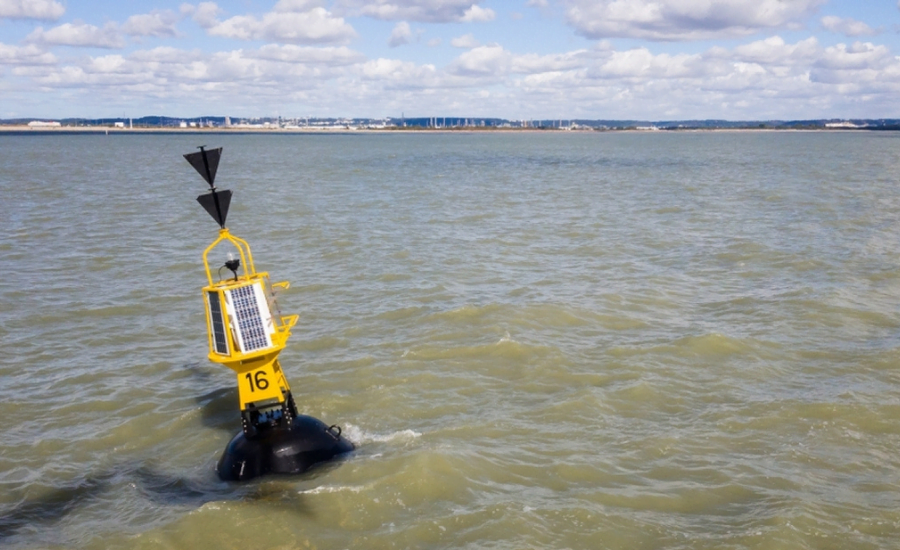
South Cardinal Marker:
• This marker indicates that the safest waters are to the south of the marker.
• It is black and yellow with two black cones pointing down.
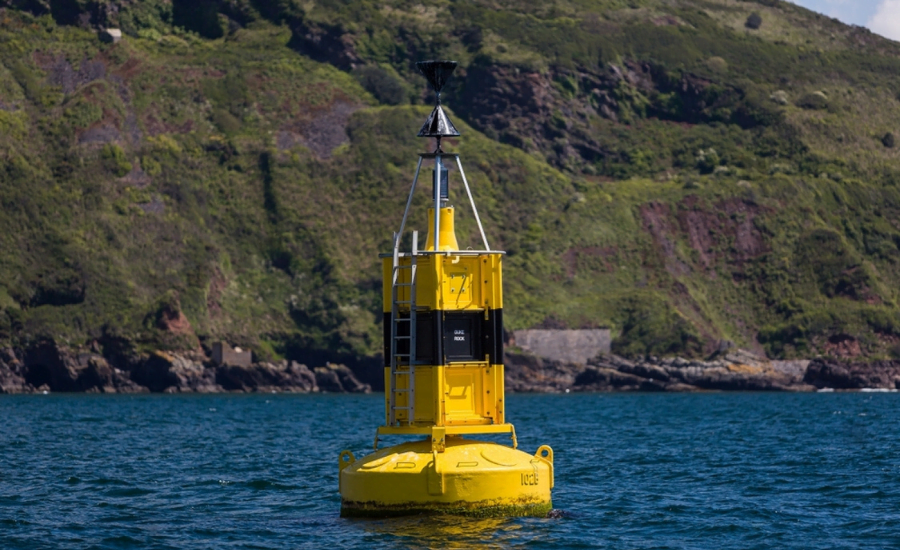
East Cardinal Marker:
• This marker indicates that the safest waters are to the east of the marker.
• Black and yellow with two black cones pointing to the right.
West Cardinal Mark:
• This mark indicates that the safest waters are to the west of the mark.
• It is black and yellow with two black cones pointing to the left.
Special Characters: Isolated Hazard Markings:
• These markings indicate hazards to navigation, such as shipwrecks or submerged rocks.
• Black with one or more red horizontal stripes and two black balls, one above the other.
Safe Water Markers:
• These markers indicate deep navigable water around the marker.
• It has vertical red and white stripes, often with a pattern such as a ball or cylinder on the top.
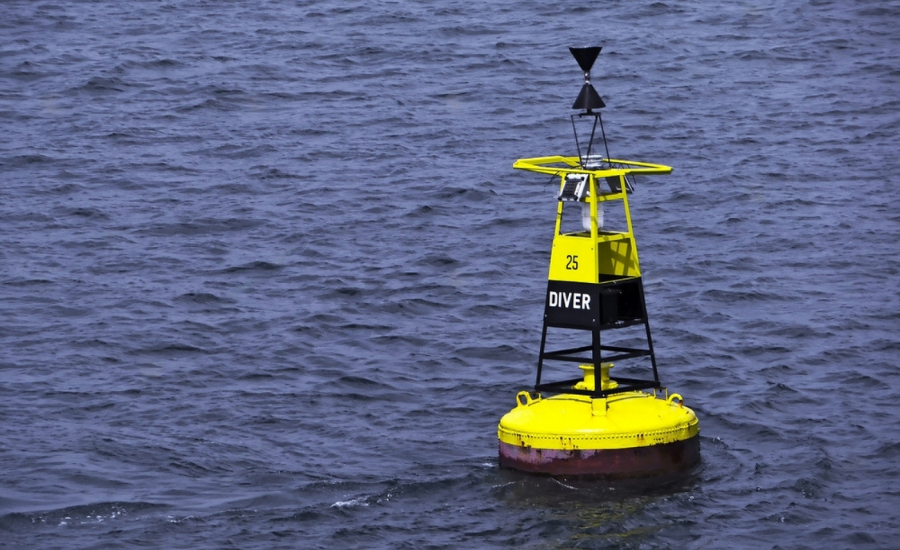
Special Purpose Markings:
• Markings used to identify special areas or features. B. Military training range or underwater pipeline.
• Can be made into different shapes and colours depending on the purpose.
Advanced Navigation Considerations:
Range Marks:
• These markers are typically used to mark a specific line of entry into a channel.
• Range Marker consists of two structures, one fore and one aft, which, when aligned, guide the ship along the desired course.
L 50.
Guiding lights:
•Guiding lights are her two sets of lights used to guide vessels along specific lines.
• By adjusting the position of the lights, sailors can maintain the correct course in canals, especially in narrow or winding channels.
51.
Sector Lights:
• Sector lights are used to indicate safe sectors in which a vessel may sail without danger.
• Sailors ensure they are within the recommended navigable path by remaining within the illuminated sector.
52.
Properties of Light:
• Understanding the properties of light is important for identifying specific markers during day and night navigation.
• Lights come in a variety of colours, frequencies, and durations and provide information about the nature and purpose of the navigational aid 53.
Audio Signals:
• In addition to visual aids, audio signals play an important role in navigation, especially in situations with limited visibility.
• Fog signals, whistle signals, and bell signals are standardized to convey information about the condition of a vessel or the proximity of navigational hazards.
AIS (Automatic Identification System):
• Modern navigation uses AIS, which allows ships to transmit their identity, position, course, and speed.
• AIS improves situational awareness, allowing mariners to avoid collisions and navigate more efficiently.
Navigating Difficult Waters:
Tidal Considerations:
• In tidal areas, water depth can change significantly due to the ebb and flow of the tide.
• Sailors must consider tides and currents when navigating.
These factors can affect the safe navigation of the canal.
Shallow Water and Draft Concerns:
• When navigating shallow water or areas with shallow water, it is important to know the draft of the vessel.
• Navigational aids, especially depth markers, and buoys, provide important information to avoid grounding.
Electronic Navigation Systems:
• GPS, radar, and electronic mapping systems have become essential tools for modern navigation.
• Seafarers must be proficient in the use of electronic navigational aids while maintaining traditional navigational skills.
Emergency Procedures:
• Emergency preparedness is fundamental to maritime safety.
• Familiarize yourself with emergency procedures, including distress signals, radio communication protocols, and evacuation plans.
Weather Conditions:
• Weather has a significant impact on navigation and can affect visibility, sea conditions, and vessel stability.
• Check the weather forecast regularly and be prepared to adapt your navigation plan to changing weather conditions.
Continuing Learning and Training:
Professional Development:
• Maritime regulations, technology, and best practices evolve over time.
• Commit to continuous learning through continuing education courses, workshops, and industry publications.
Simulator Training:
• Simulator training provides a realistic environment to practice navigation skills and deal with various scenarios.
• Regular simulator sessions improve seafarers’ ability to respond effectively to difficult situations.
Cooperation and Communication:
• Effective communication between crew members and with other vessels is essential for safe navigation.
• Conduct regular safety briefings and training to ensure smooth communication at critical moments.
Conclusion
Understanding the various markings on buoyage system is essential for safety at sea. Whether you’re a professional sailor or a recreational boater, these markings serve as a common language on the water, guiding vessels safely through canals, ports and hazardous locations. Additionally, they provide essential information for navigating unfamiliar waters, ensuring safe passage for all types of watercraft. Furthermore, these markings help to prevent collisions and ensure efficient traffic flow on busy waterways. In conclusion, understanding and adhering to these markings is crucial for maintaining safety and order on the water. Stay alert, follow buoyage system, and navigate the waters safely and accurately. Safe travels!